Uploading a Layer
Upload your own geospatial files to overlay custom data on the map.
Updated · June 2026
Uploading a Layer#
You can upload your own geospatial data to Pillar and overlay it on the map alongside parcels and built-in layers. Uploaded layers are shared with your entire organization in real time.
Supported formats#
- GeoJSON (
.geojson,.json) - KML / KMZ (
.kml,.kmz) - GeoPackage (
.gpkg) - Shapefile (
.zip- must contain.shp,.shx,.dbffiles) - CSV (
.csv- with coordinate columns) - Excel (
.xlsx- with coordinate columns)
Maximum file size: 2 GB per file.
How to upload#
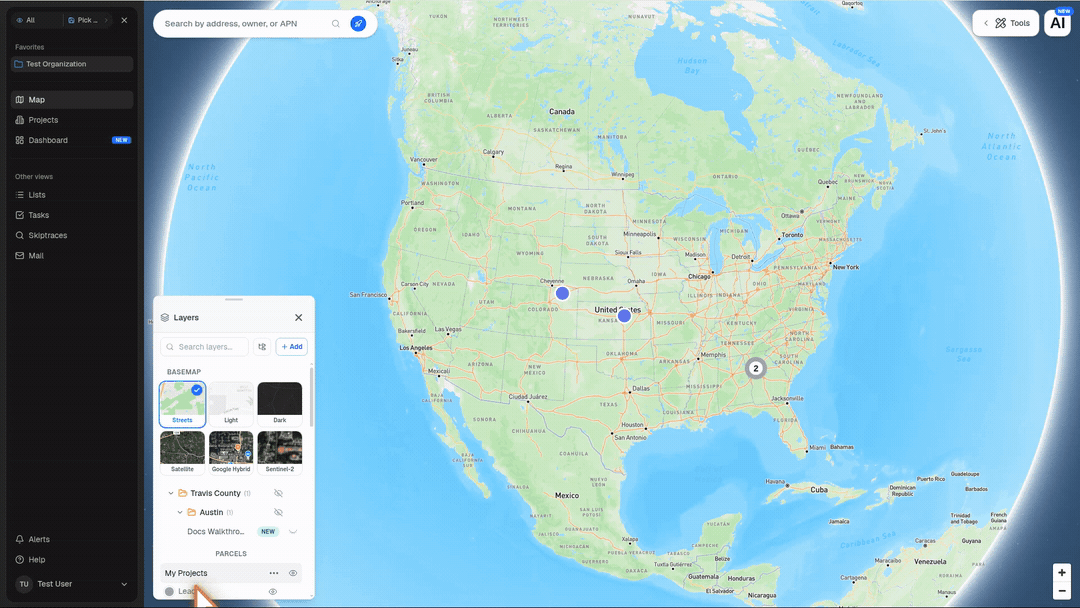
- Open the Layers panel on the map
- Click the Upload tab in the Layer Library
- Drag and drop your file, or click to browse. You can upload multiple files at once
- Pillar validates and converts your file automatically
During processing, you'll see real-time progress: validating, converting, storing, and recording. Once complete, your layer appears in the Uploaded Layers tab.
If an upload fails, you can retry it without re-uploading the file.
Adding a layer to the map#
After uploading, open the Uploaded Layers tab in the Layer Library and click Add next to your layer. It will appear in the layers panel with a visibility toggle.
Grouping uploaded layers by geography#
Uploaded layers can be organized into county and city groups in the Layers panel. When Pillar can match an uploaded geospatial layer to a specific local geography, the layer can sit under groups like Travis County and Austin instead of staying in one long uploads list.
To group eligible uploads:
- Open the Layers panel
- Click the Auto Group button next to Add
- Choose County / city for uploads
You can also group one layer at a time: open the layer's More menu and choose Auto group by geography.
Pillar groups organization-owned uploaded layers when they are geospatial, have geography metadata, and resolve cleanly to a county or city. National, state-only, multi-county, and unclassified uploads stay ungrouped so the layer list does not hide ambiguous data.
When you toggle an uploaded layer on the map, Pillar serves the converted layer file through a signed storage URL behind the scenes. You do not need to manage that URL. Pillar refreshes access as needed while keeping the stored file private to your organization.
Exporting uploaded layers as GeoJSON#
Open an organization-owned uploaded layer's More menu to find its GeoJSON export action. Community and Pillar-provided layers cannot be exported from this menu. The label tells you what Pillar will do:
- Download GeoJSON exports a full GeoJSON file
- Classify & Download GeoJSON classifies the layer first, then exports it
- Download Properties Only exports parcel-classified data without geometry
Open File Info from the same menu to check the layer's Data kind and GeoJSON status. Data kind can be Parcel, Non-parcel, or Unknown. If it is unknown, Pillar classifies the layer on demand when you export.
Native GeoJSON uploads download from the original source file. Other geospatial formats, like Shapefiles or spreadsheets with coordinates, export from Pillar's converted layer data. Very large layers may be too large for GeoJSON export; if an export is still being prepared, wait a moment and try again.
Styling your layer#
Click on a layer in the layers panel to open the styling controls. Three style modes are available:
- Simple - a single color for all features, with controls for fill color, opacity, stroke, and line width
- Categories - color features by a property value (e.g., color parcels by zoning type), with up to 20 distinct categories
- Color Range - color by a numeric property using a gradient (choose from presets like Viridis, Blue-to-Red, Sunset, and more)
You can also configure:
- Labels - choose a property to display as text labels, with font size, color, and halo controls
- Zoom range - set minimum and maximum zoom levels for when the layer is visible
Style changes are saved automatically and shared with your team.
Filtering features#
Use the Filter tab in the styling panel to show only features that match specific criteria. Available operators include equals, contains, greater than, less than, between, and more. Date properties get dedicated date picker controls.
Configuring popups#
The Popup tab lets you control which attributes appear when you click a feature on the map. You can reorder fields, hide irrelevant ones, and set custom labels.
Tips#
- All uploaded layers are visible to your entire organization. Any team member can toggle them on
- Non-geospatial files (spreadsheets without coordinates) are stored but won't appear as map layers
- You can cancel an in-progress upload at any time